Update 2021-06 – A trick while you wait for the part: If its only intermittently failing, run coffee through the machine without a pod first. This seems to align the failing part sometimes and may let you more reliably make a coffee the second run time its used.
If you are going to purchase the part from Amazon or Ebay, please consider using my affiliate links. This site runs at a loss and I would really appreciate it 🙂
https://amzn.to/3ywdHei https://ebay.us/PGtfNL
With this model its possible for the duct to not move properly and so the coffee goes straight down the back down into the drip tray. Its easy to fix and doesn’t require any tools. (although a small flat head screwdriver and a credit card are handy)
You will need to possibly buy a part, so its a good idea to read this whole guide before starting. Any time you see numbers in brackets e.g. (24) that means I am referencing a part from the official parts list at the bottom of this page)
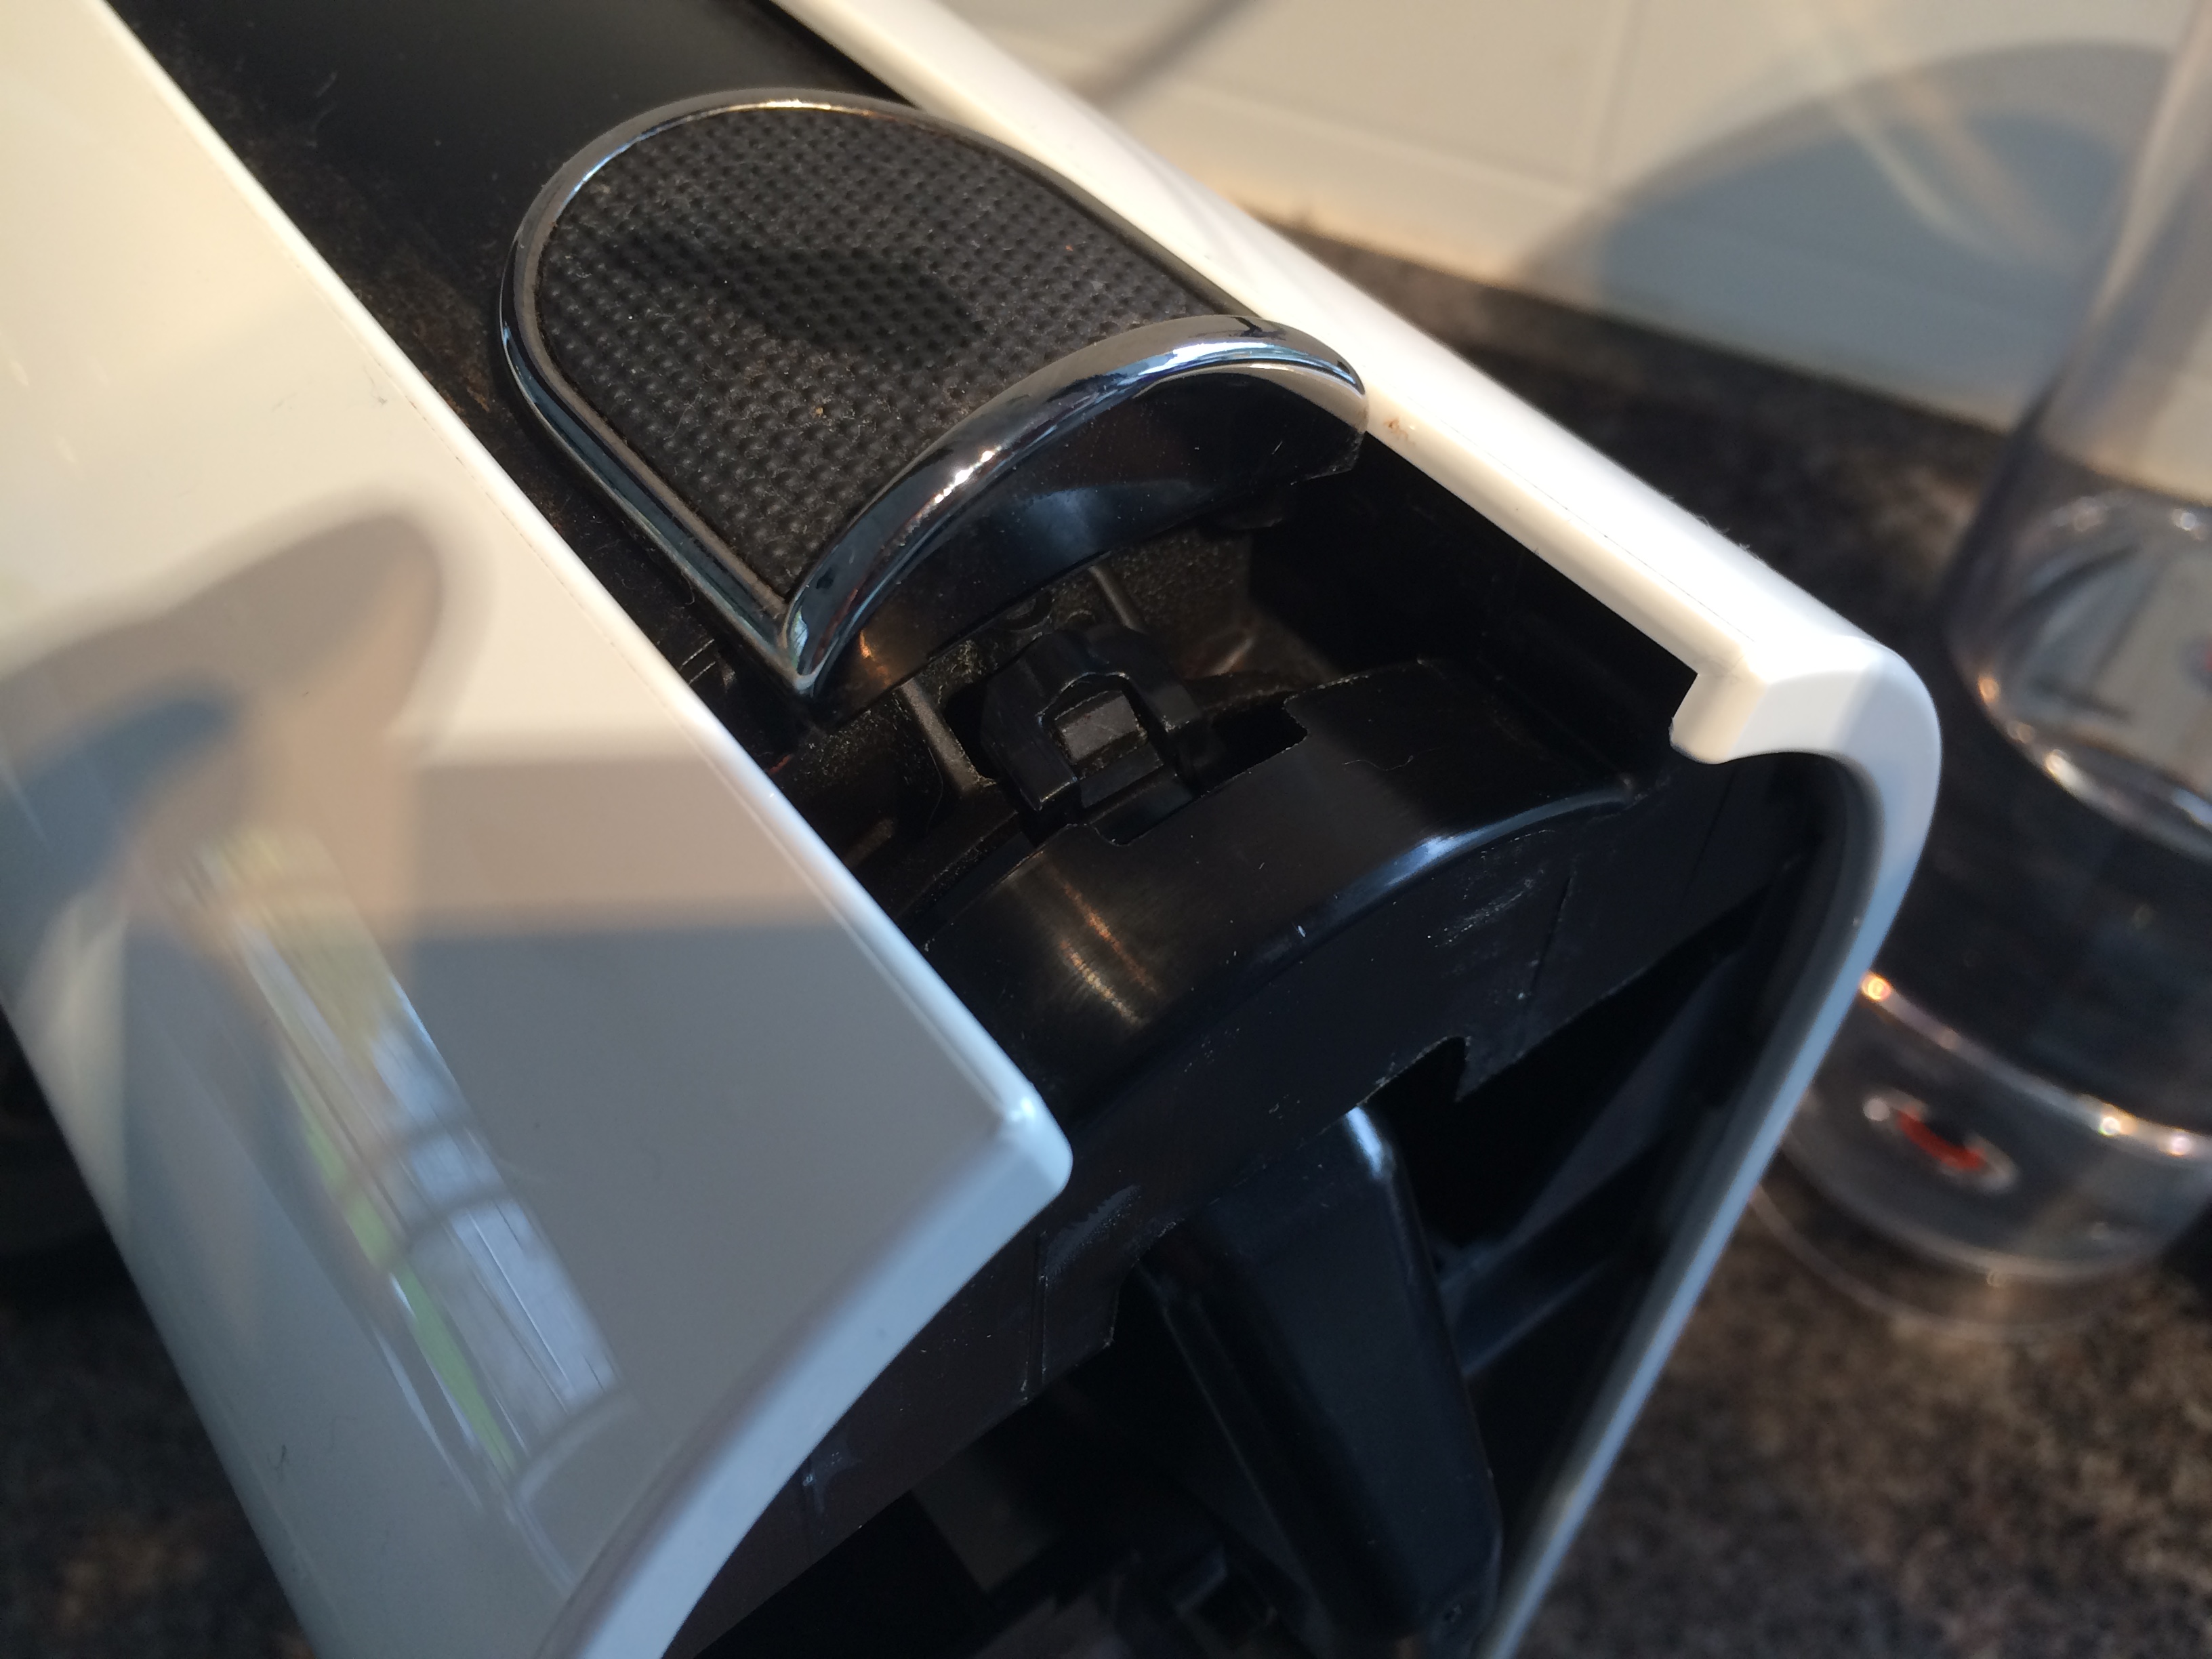
First you need to verify that it is in fact the improperly moving spout(7) that causing the issue so you need to take the front cover off. This is quite straight forward but you will need to apply a bit of force to the sides to get into the machine.
- Unplug the machine from the wall
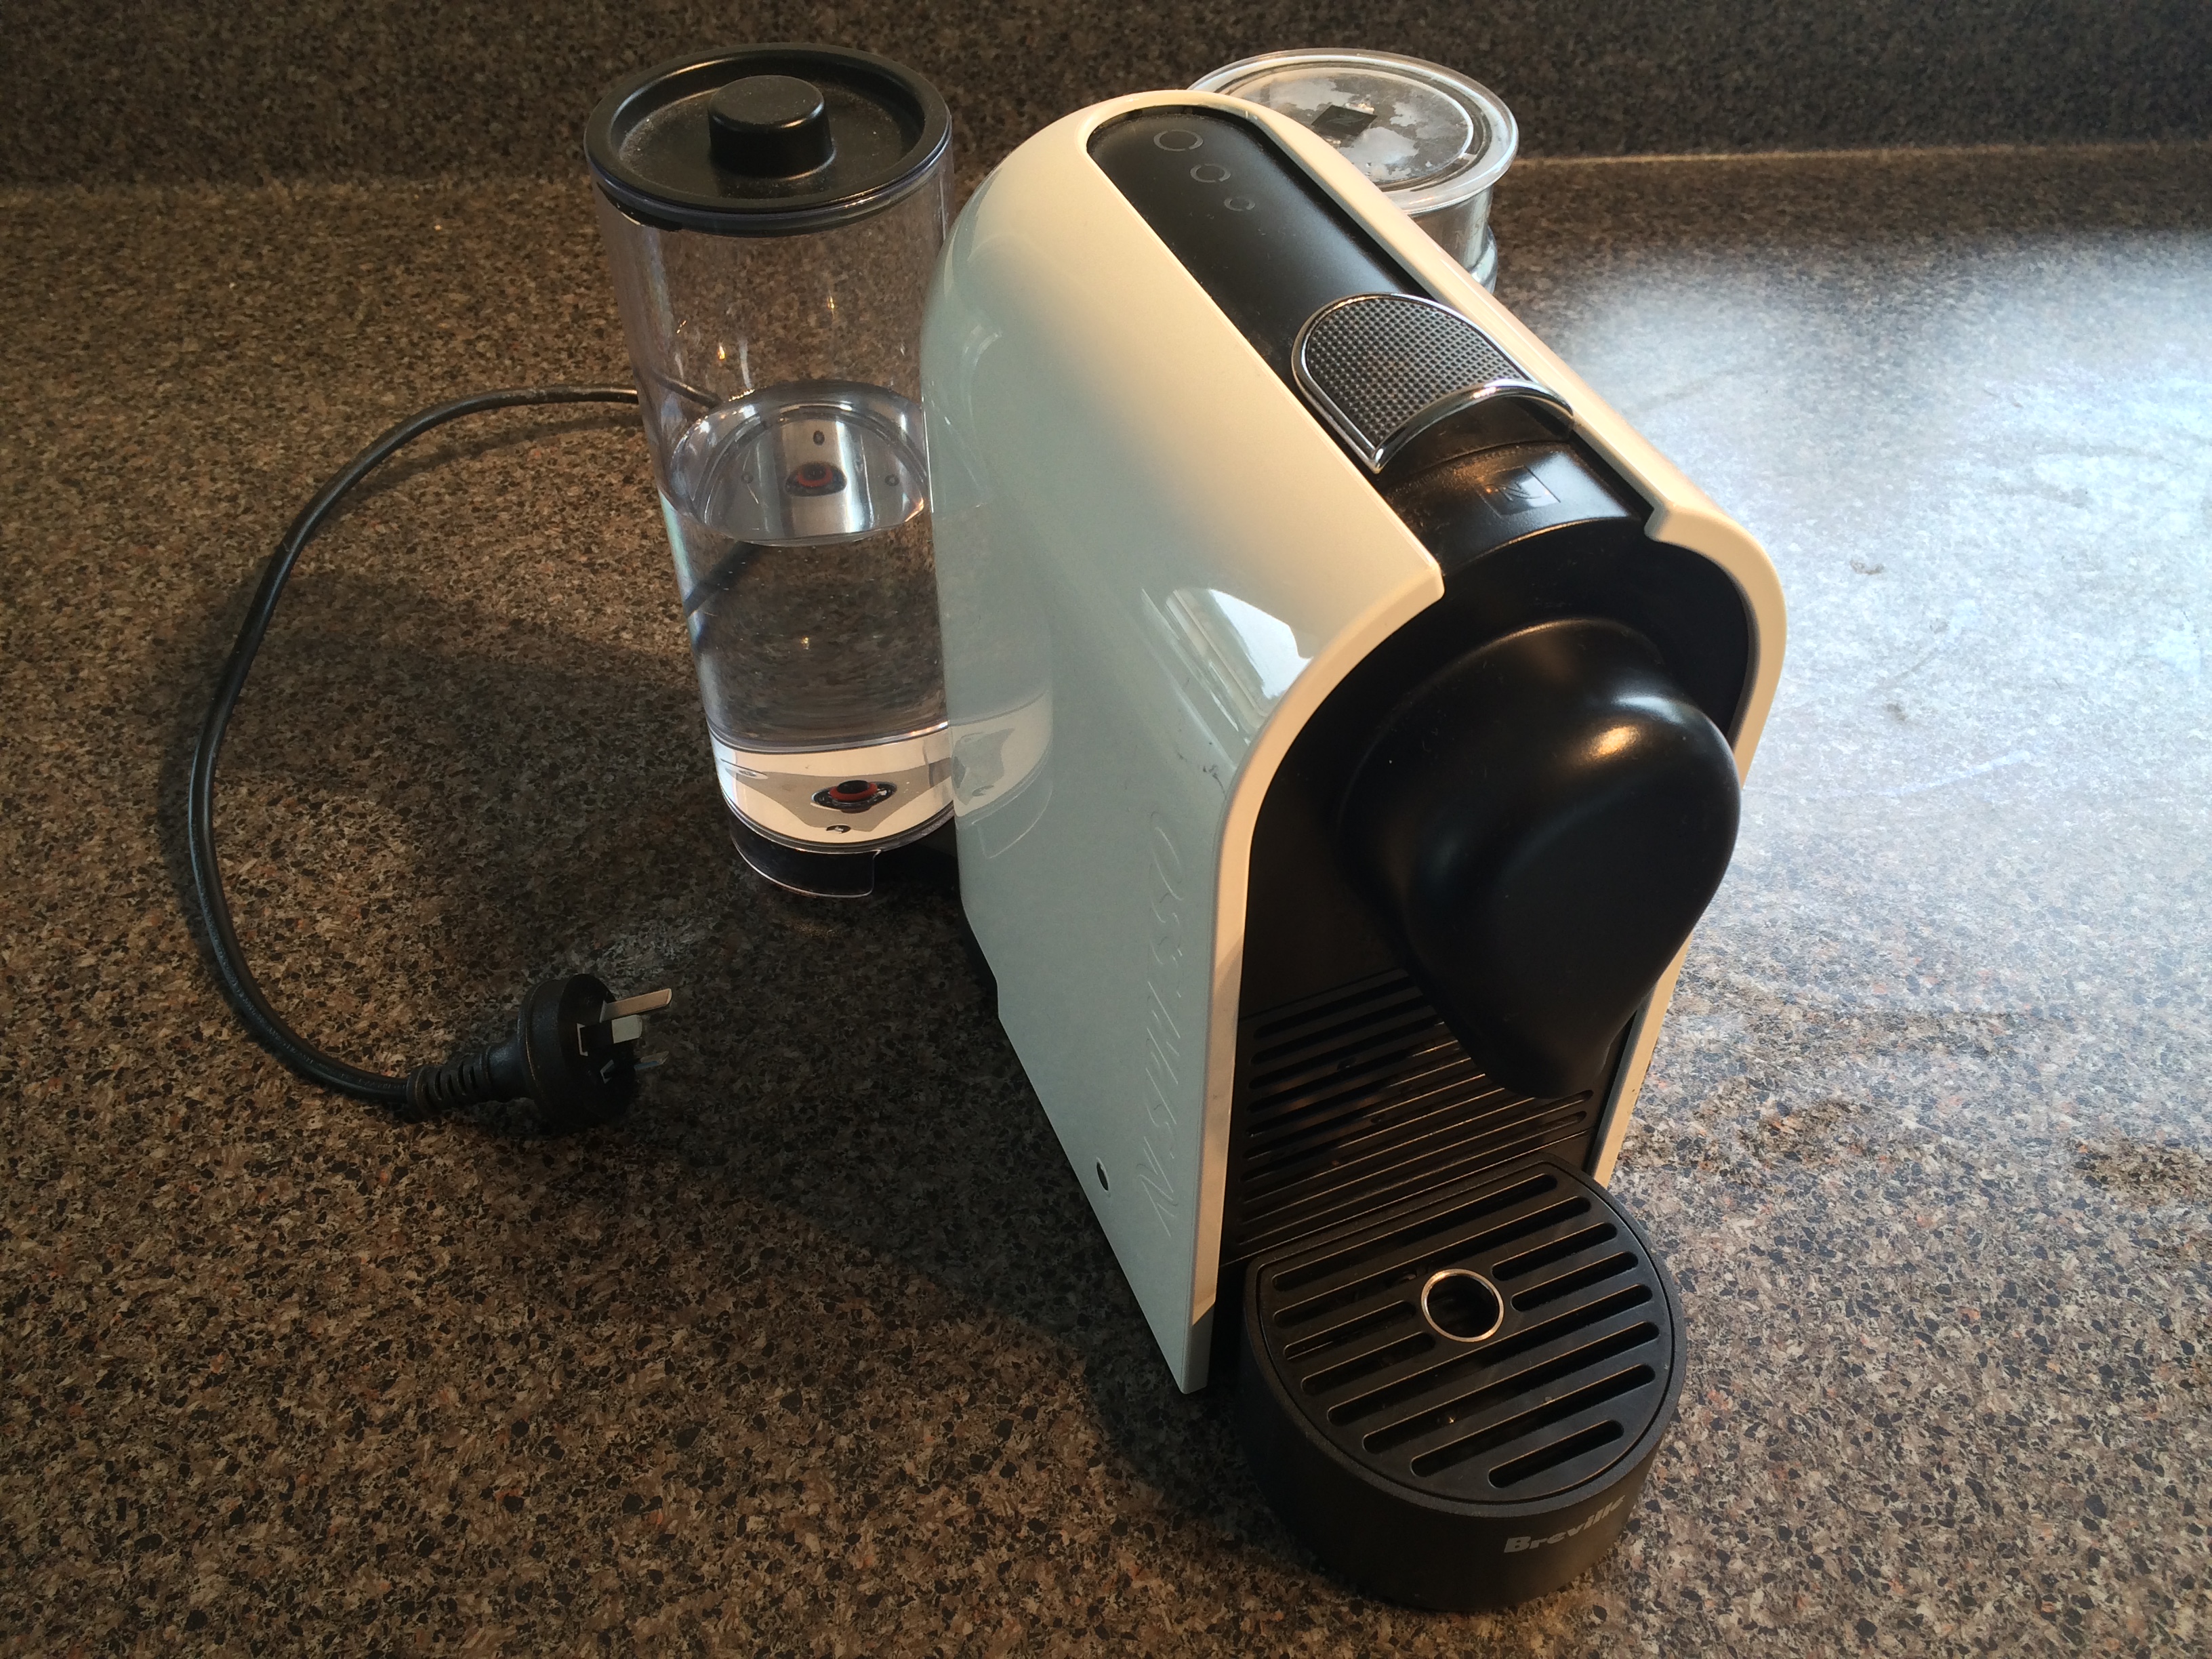
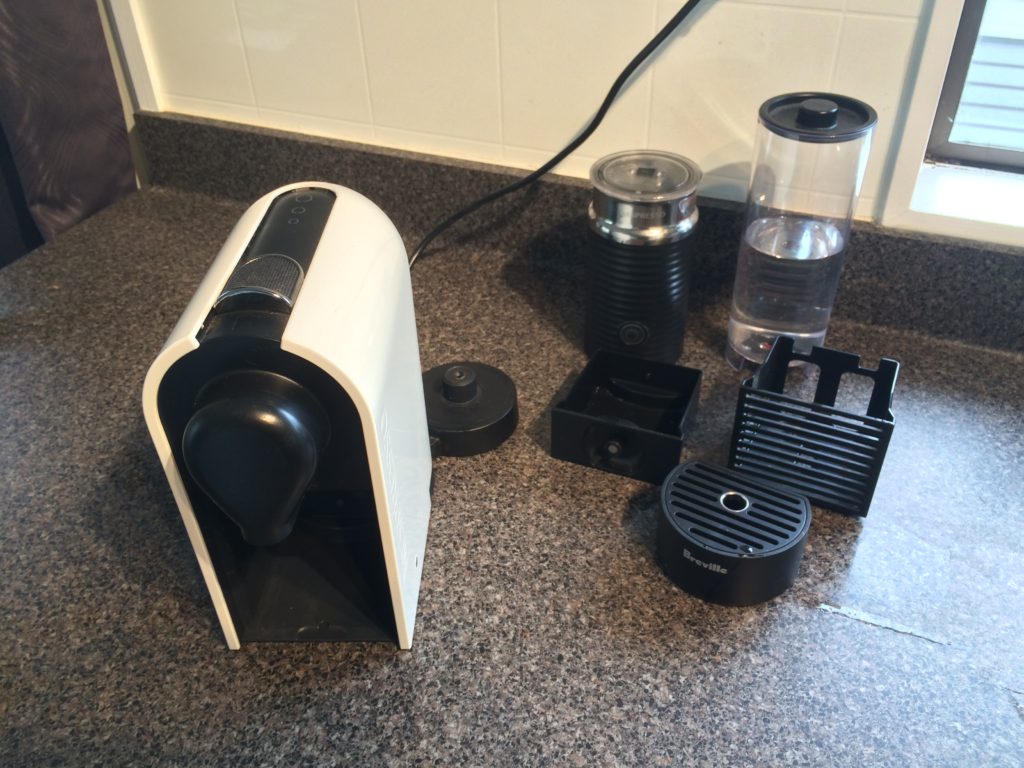
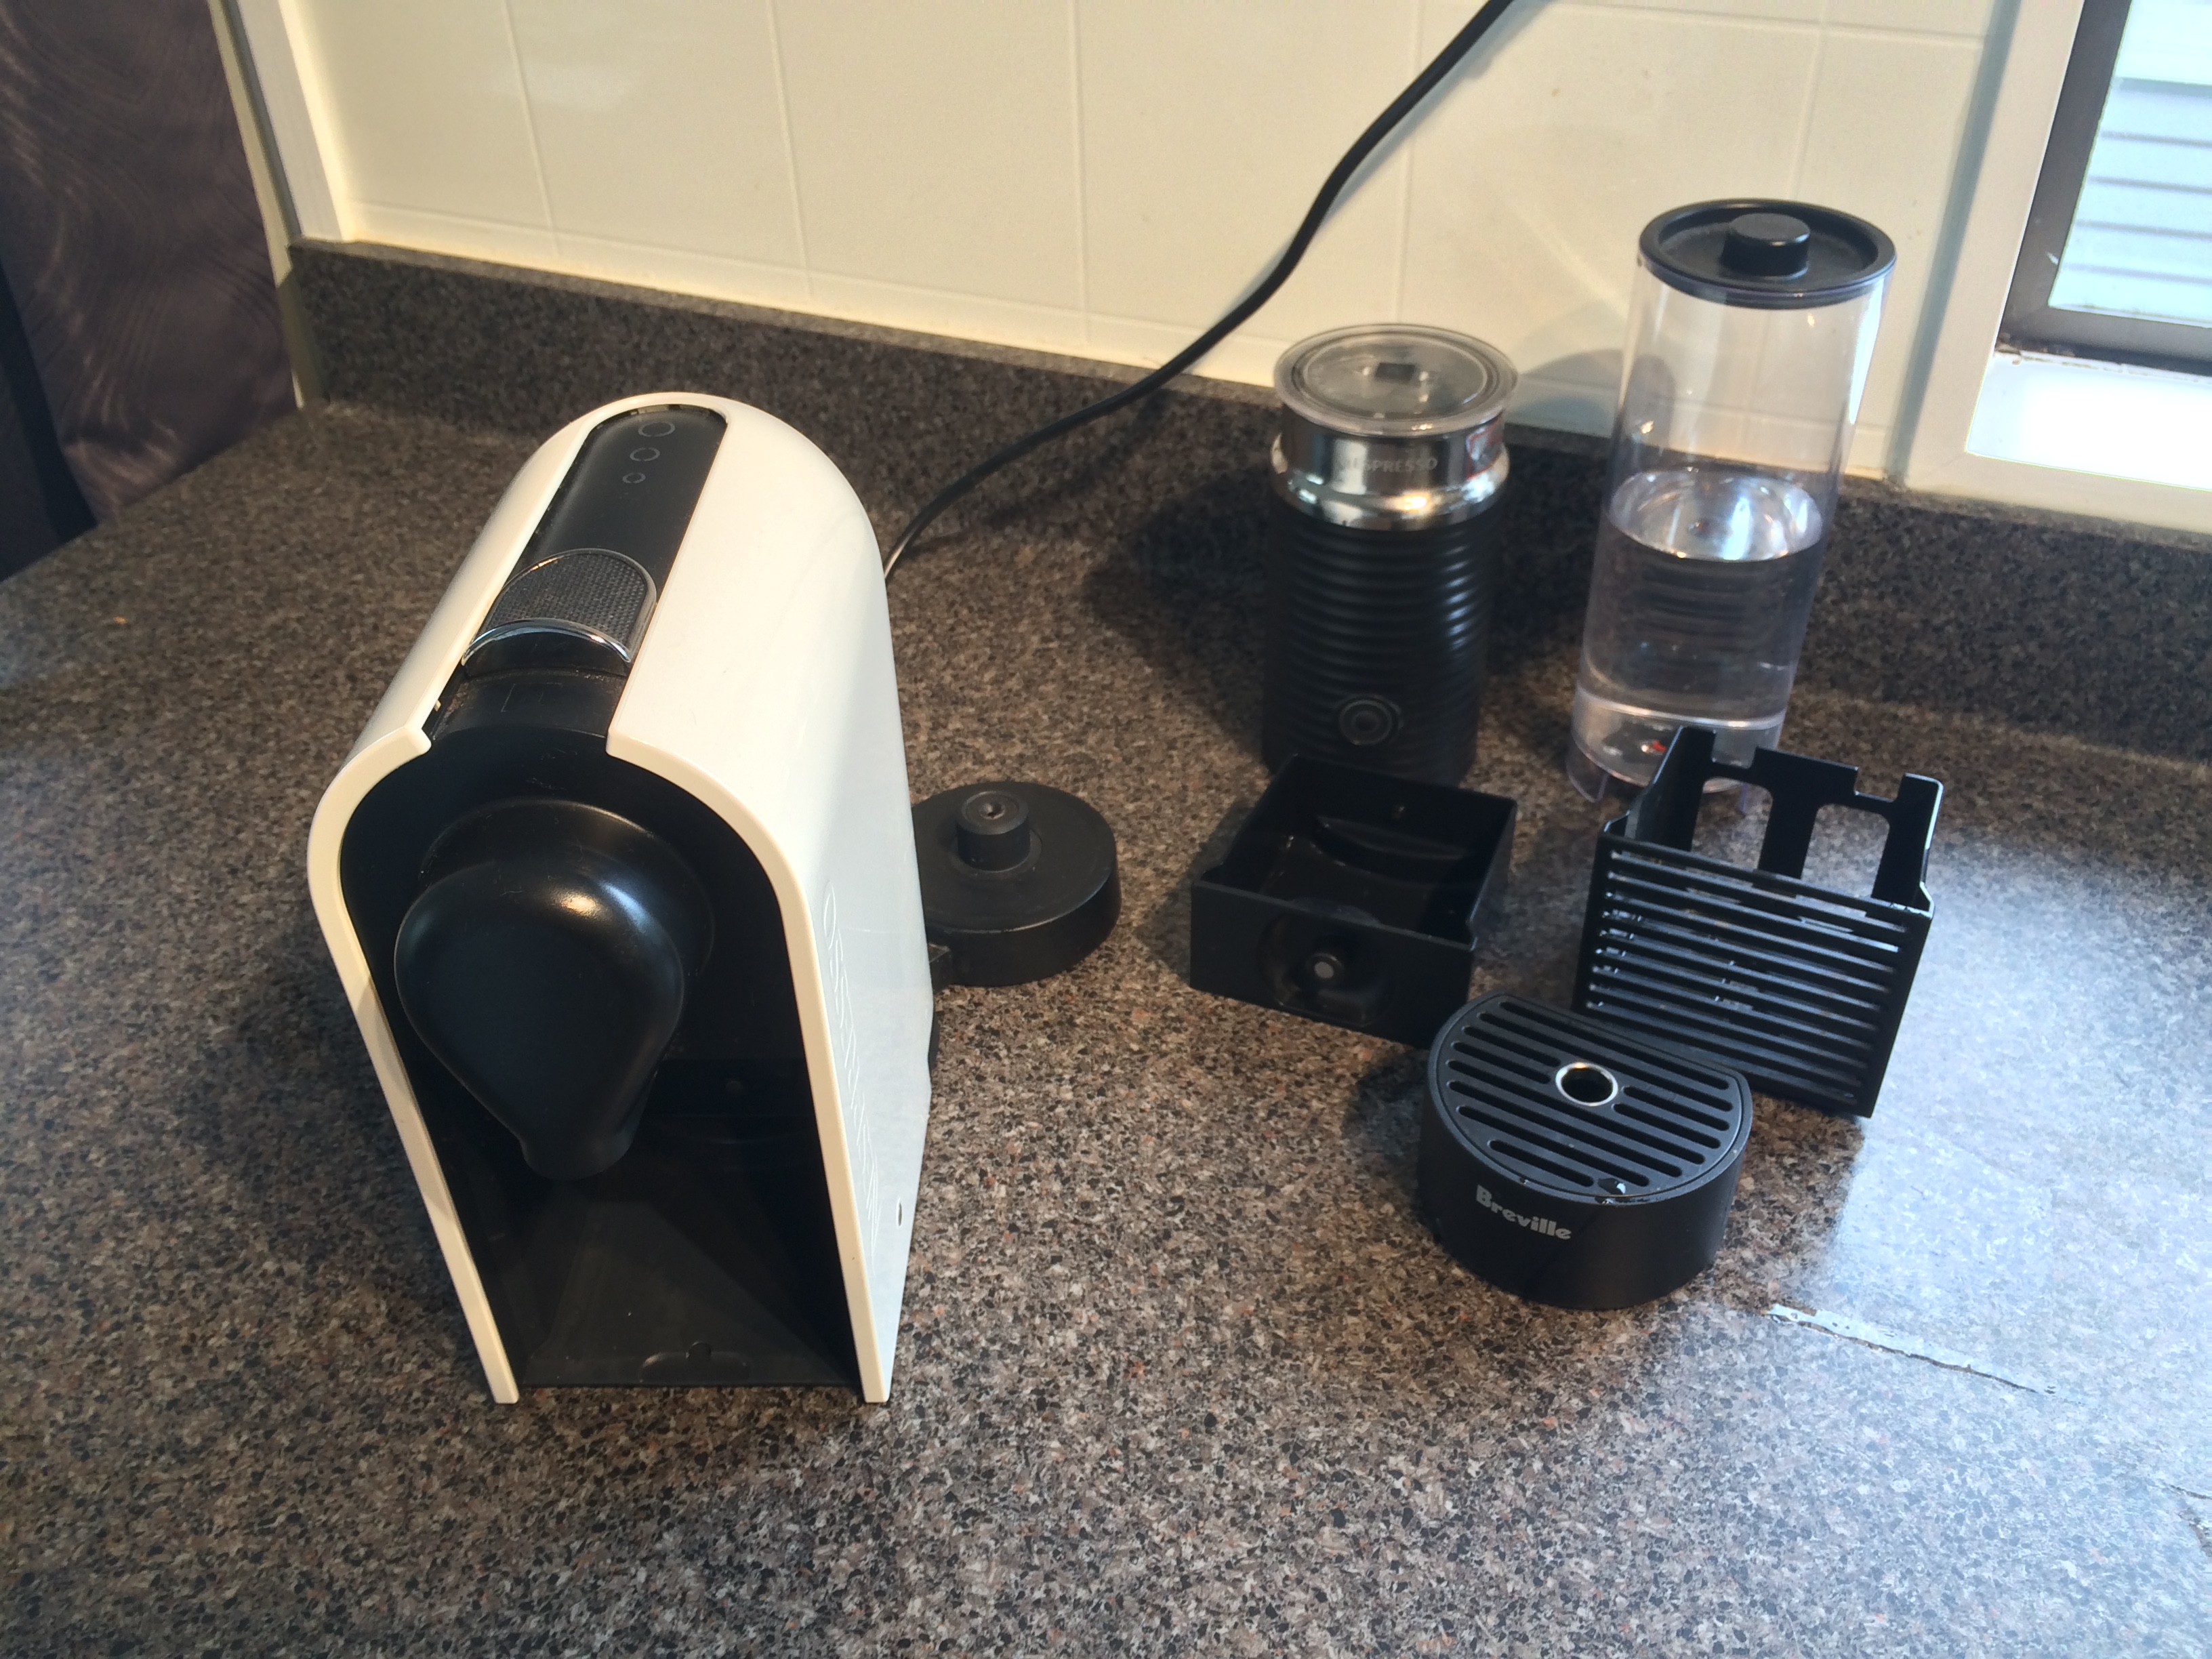
- Remove all the bits you can, water tank, milk frother, drip trays etc
- Pull the bottom of the outer cover (1) outwards. They should click out then you can pull them a little bit to remove the front cover
4. Once the front cover(8) is removed, plug the machine back in, put the water tank (24) back on with water in it.
5. You don’t need to put a pod in, but if you flick the pod opening back and forward you can inspect the operation.
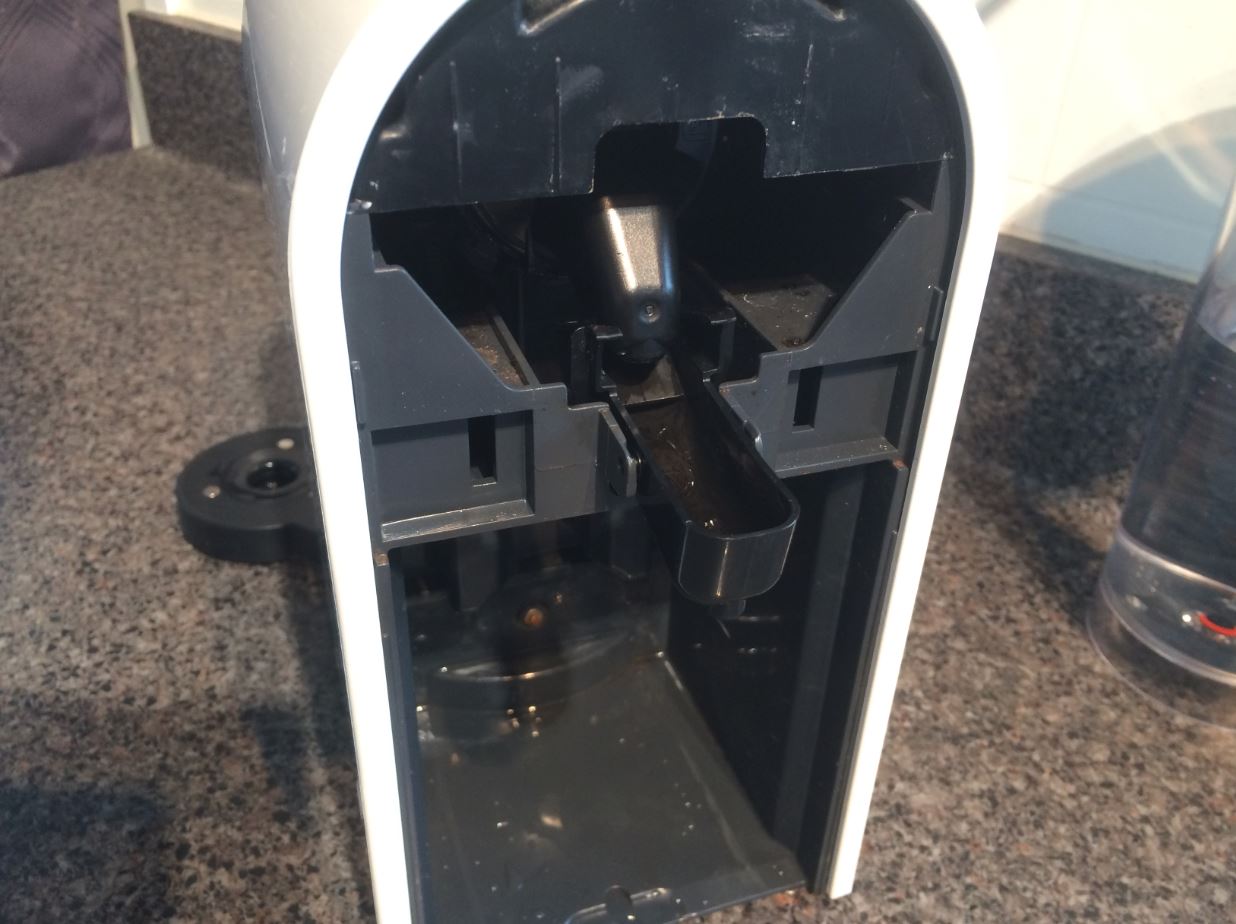
If the duct(7) doesn’t move up and down, or gets pushed forward when the distributor (34) moves forward then this guide might be for you.
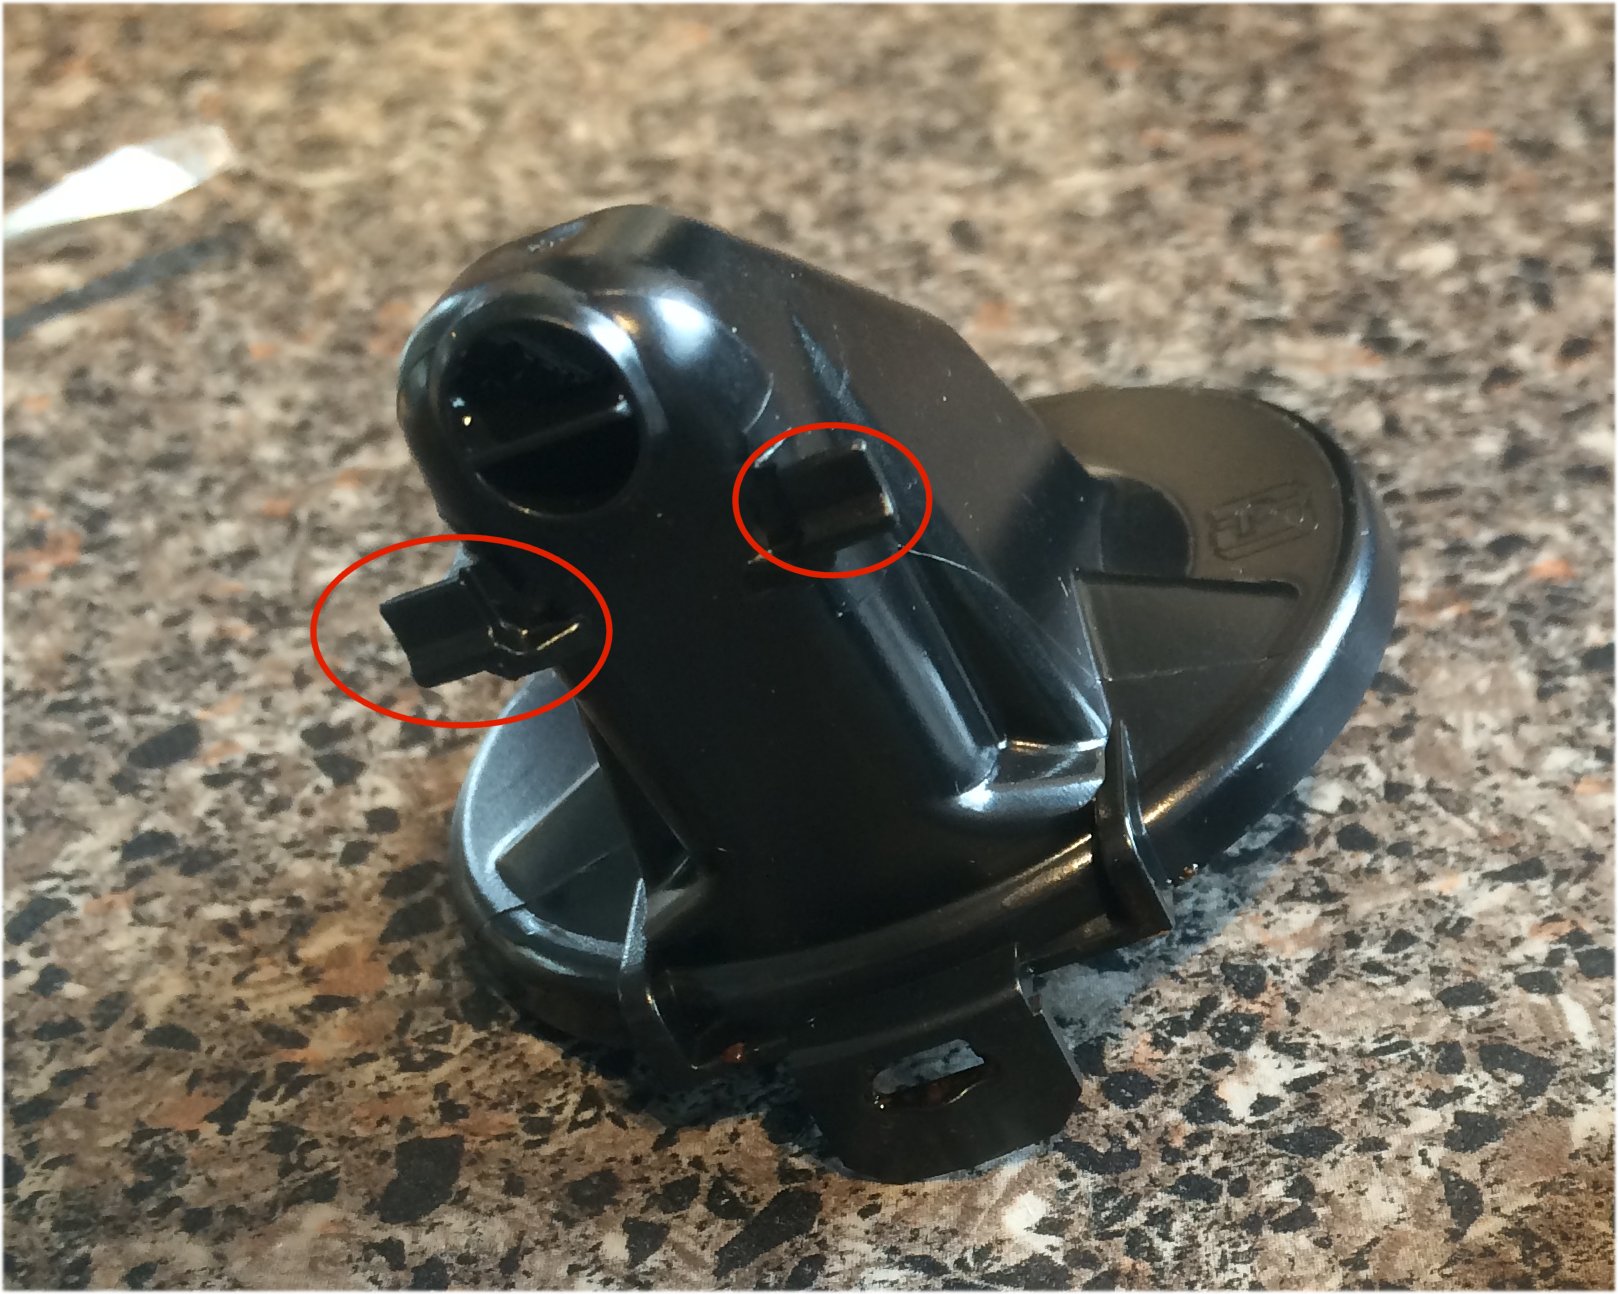
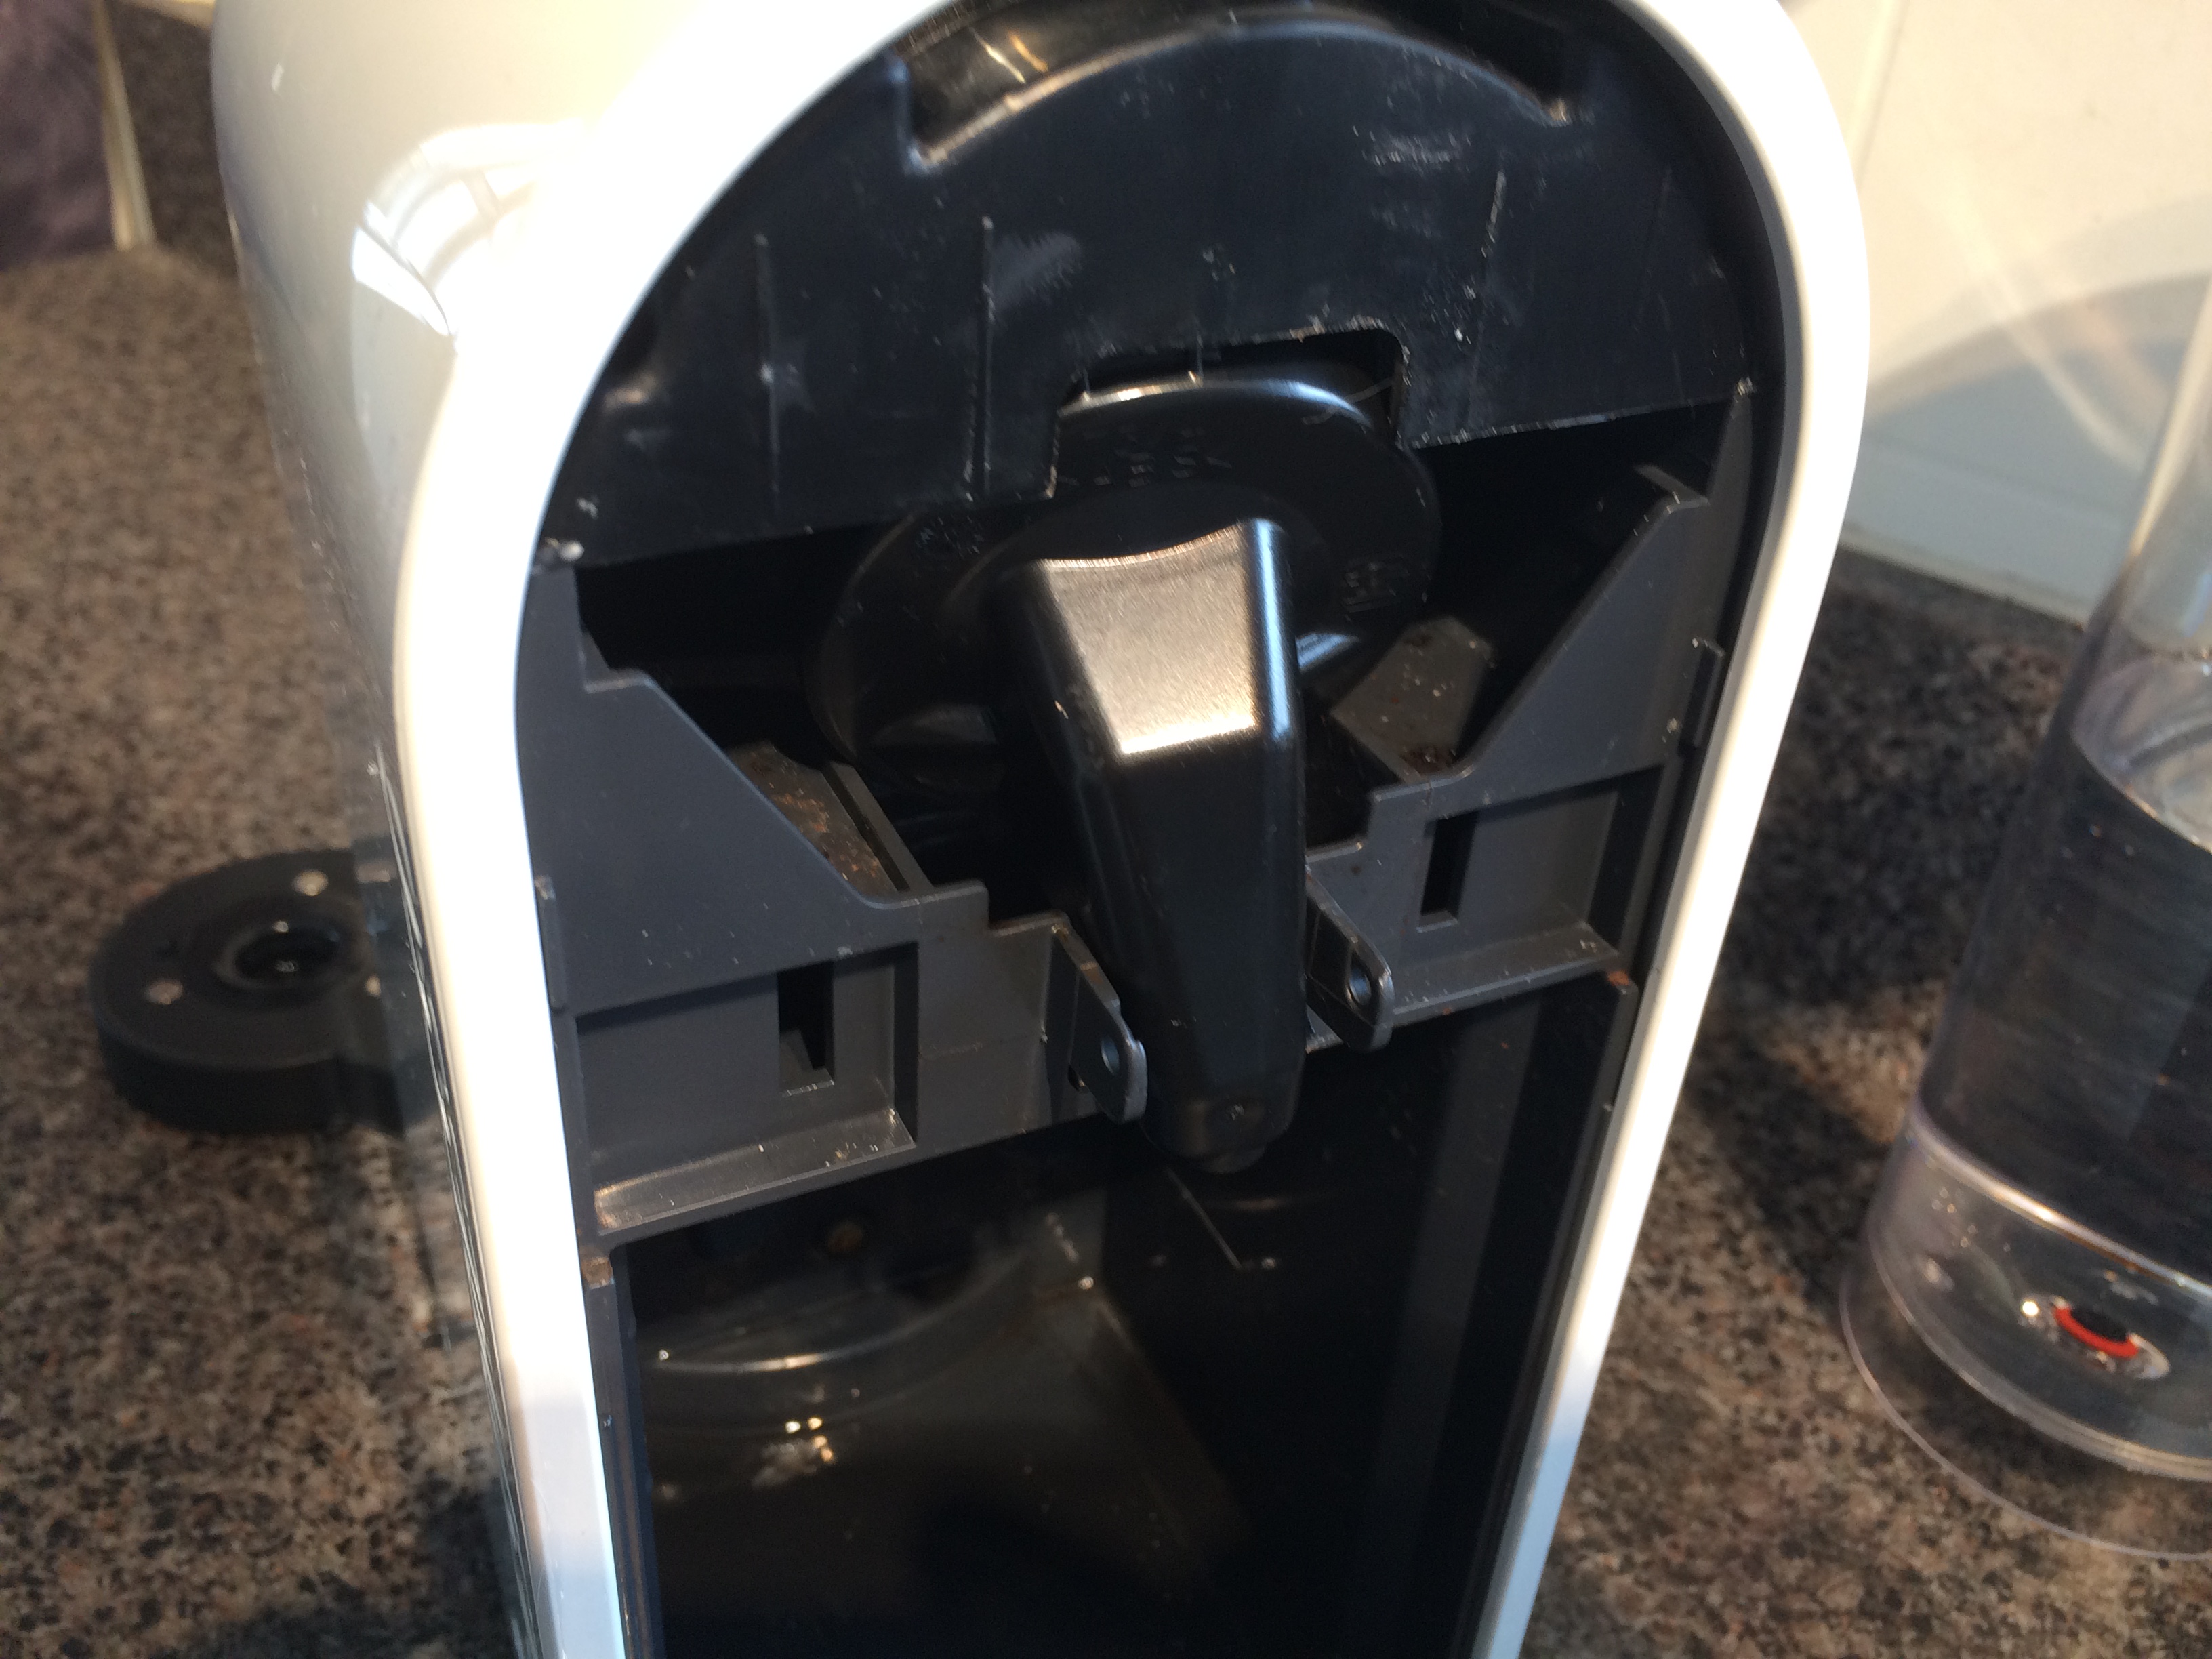
What has happened is the there are two little plastic guides on the front of the distributor (34) that have probably broken off
You could try and use some super glue and make new guides with some plastic nibs, for example cut some short bits off a cotton bud stick 2-3mm long and glue them here on here.
But I found it easier to just buy the part, they are quite cheap on
https://amzn.to/3ywdHei https://ebay.us/PGtfNL
Removing and re-attaching the part is easy, but can take a few goes to get the bit where you need it.
6. turn the machine on and open and close the pod lid(54) until the distributor(34) starts moving
7. when it is all the way at the back turn the power off at the wall. this will allow you to remove the spout (7)
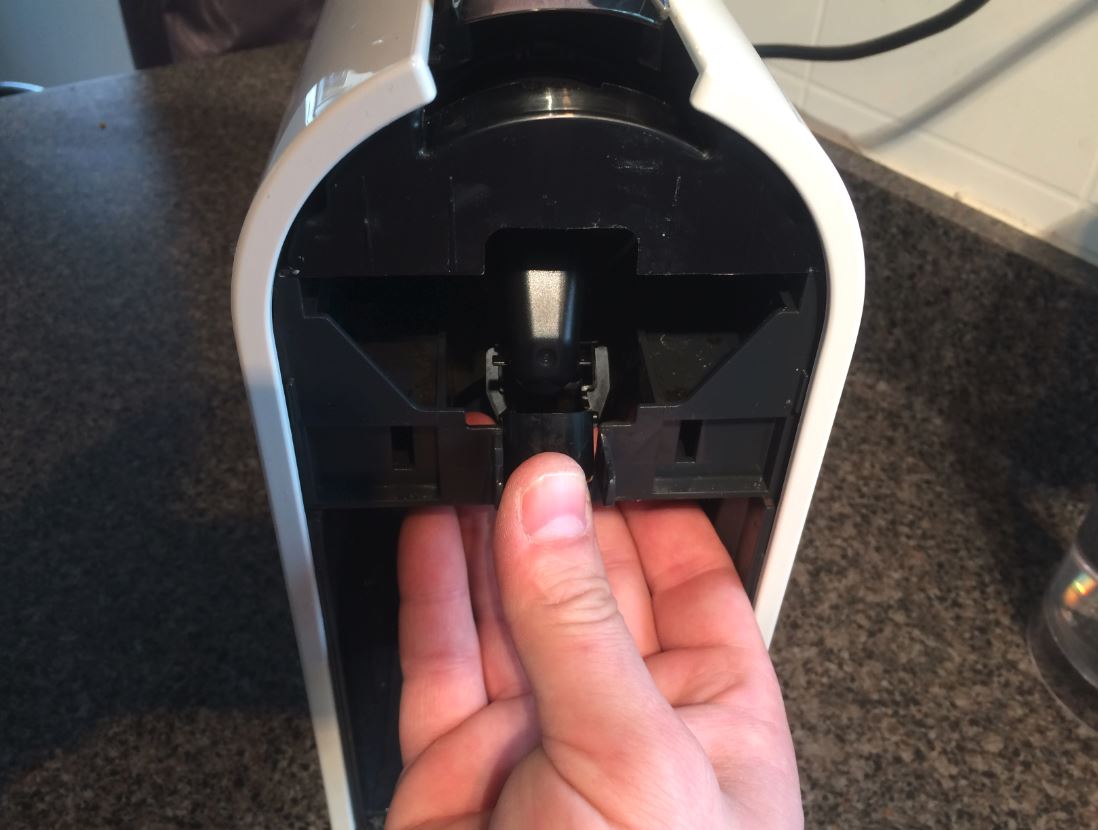
8. I found it easiest to remove the spout(7) by squeezing it in the middle then pushing the spout(7) into the machine.
Once the spout (7) is removed you need to get the distributor (34) closer to the front of the machine so you can pry it off.
9. Turn the power on and off at the wall and move the pod switch/lid (54) until you get the Distributor(34) top to be visible in the gap between the top and the front. it might take a few goes to get it where you want it to be.
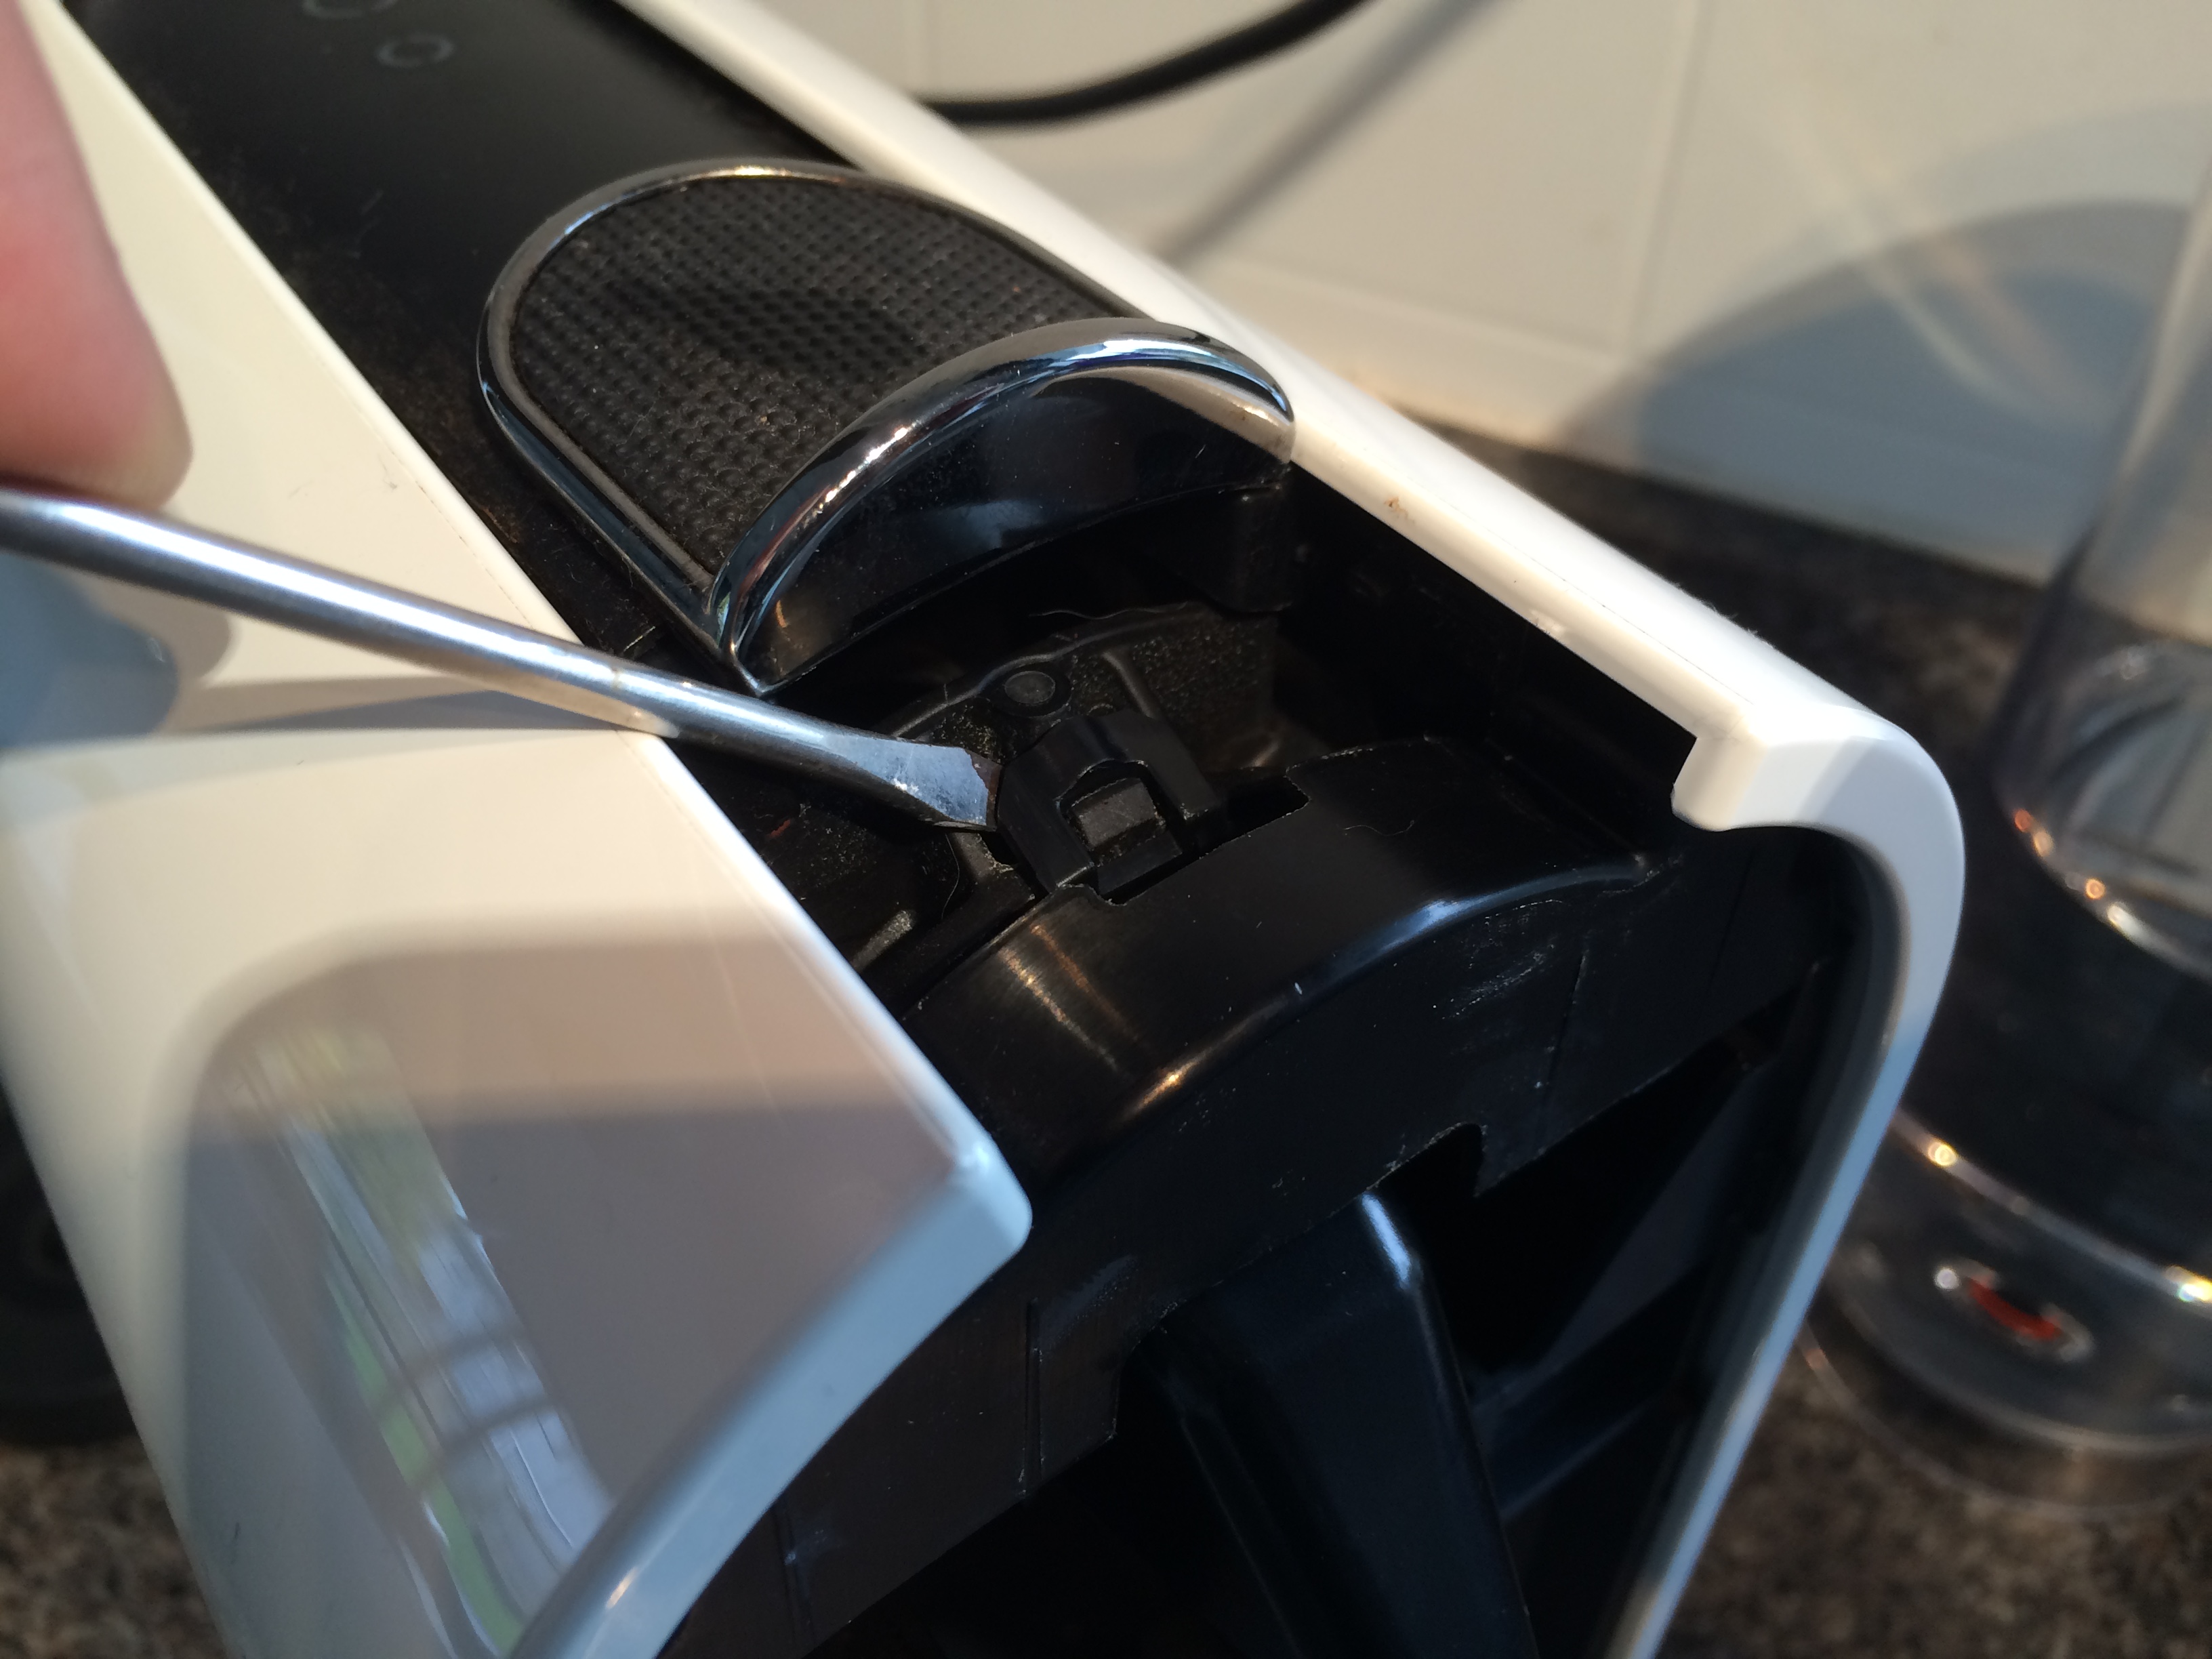
10. Now you can use a screwdriver, or a kitchen knife or any suitable thin blade type thing to push the tab at the top off the distributor(34) off the infuser(33). Where the screwdriver is placed in this picture lets it come up and off easily.
11. Remove the Distributor from the machine
I didn’t need to move the Infuser(33) back to remove the old distributor(34) but you might need to. Try not to though, as the infuser moving forward might damage the machine. If you are worried about this, leave it more or less in place but not clipped in, then it shouldn’t push things around too much.

Now we just do everything in reverse.
- Fix or get your new distributor(34)
https://ebay.us/PGtfNL https://amzn.to/3ywdHei
2. Place it back into the machine where you took the old one out. I found it easiest to place the bottom clip in first, then I applied a bit of pressure with a screwdriver to get the top clip over the latch.
you can test the distributor(34) is working now but turning the machine on and opening and closing the pod cover/switch until the machine tries to make a coffee, it doeskin need a pod and will just make hot water.
3. Move the Distributor(34) to the back of the machine using the power method mentioned above. (video for step 7 of the disassembly)
4. replace the spout (7) whichever way you find easiest. I found putting in in from the rear to be the most straightforward.
You need to be careful here to get the spout onto those little plastic guides and not break them. be patient 🙂
Now you should do another test to make sure the spout moves up and down along the guides like it should. then you can replace the front cover (8)
5. To replace the front cover simply pull the sides out a little bit again and place it into the machine, I found I needed to click the covers back in afterwards to get a tight fit.
A quick note to be careful here. Kathryn from the comments below reports that “when putting the front cover back on, I snapped the 2 little tabs either side at the top of the outer cover, above and either side of the distributor in the outer cover itself. They are almost impossible to glue back on so now “
So take care 🙂
6. Enjoy a coffee
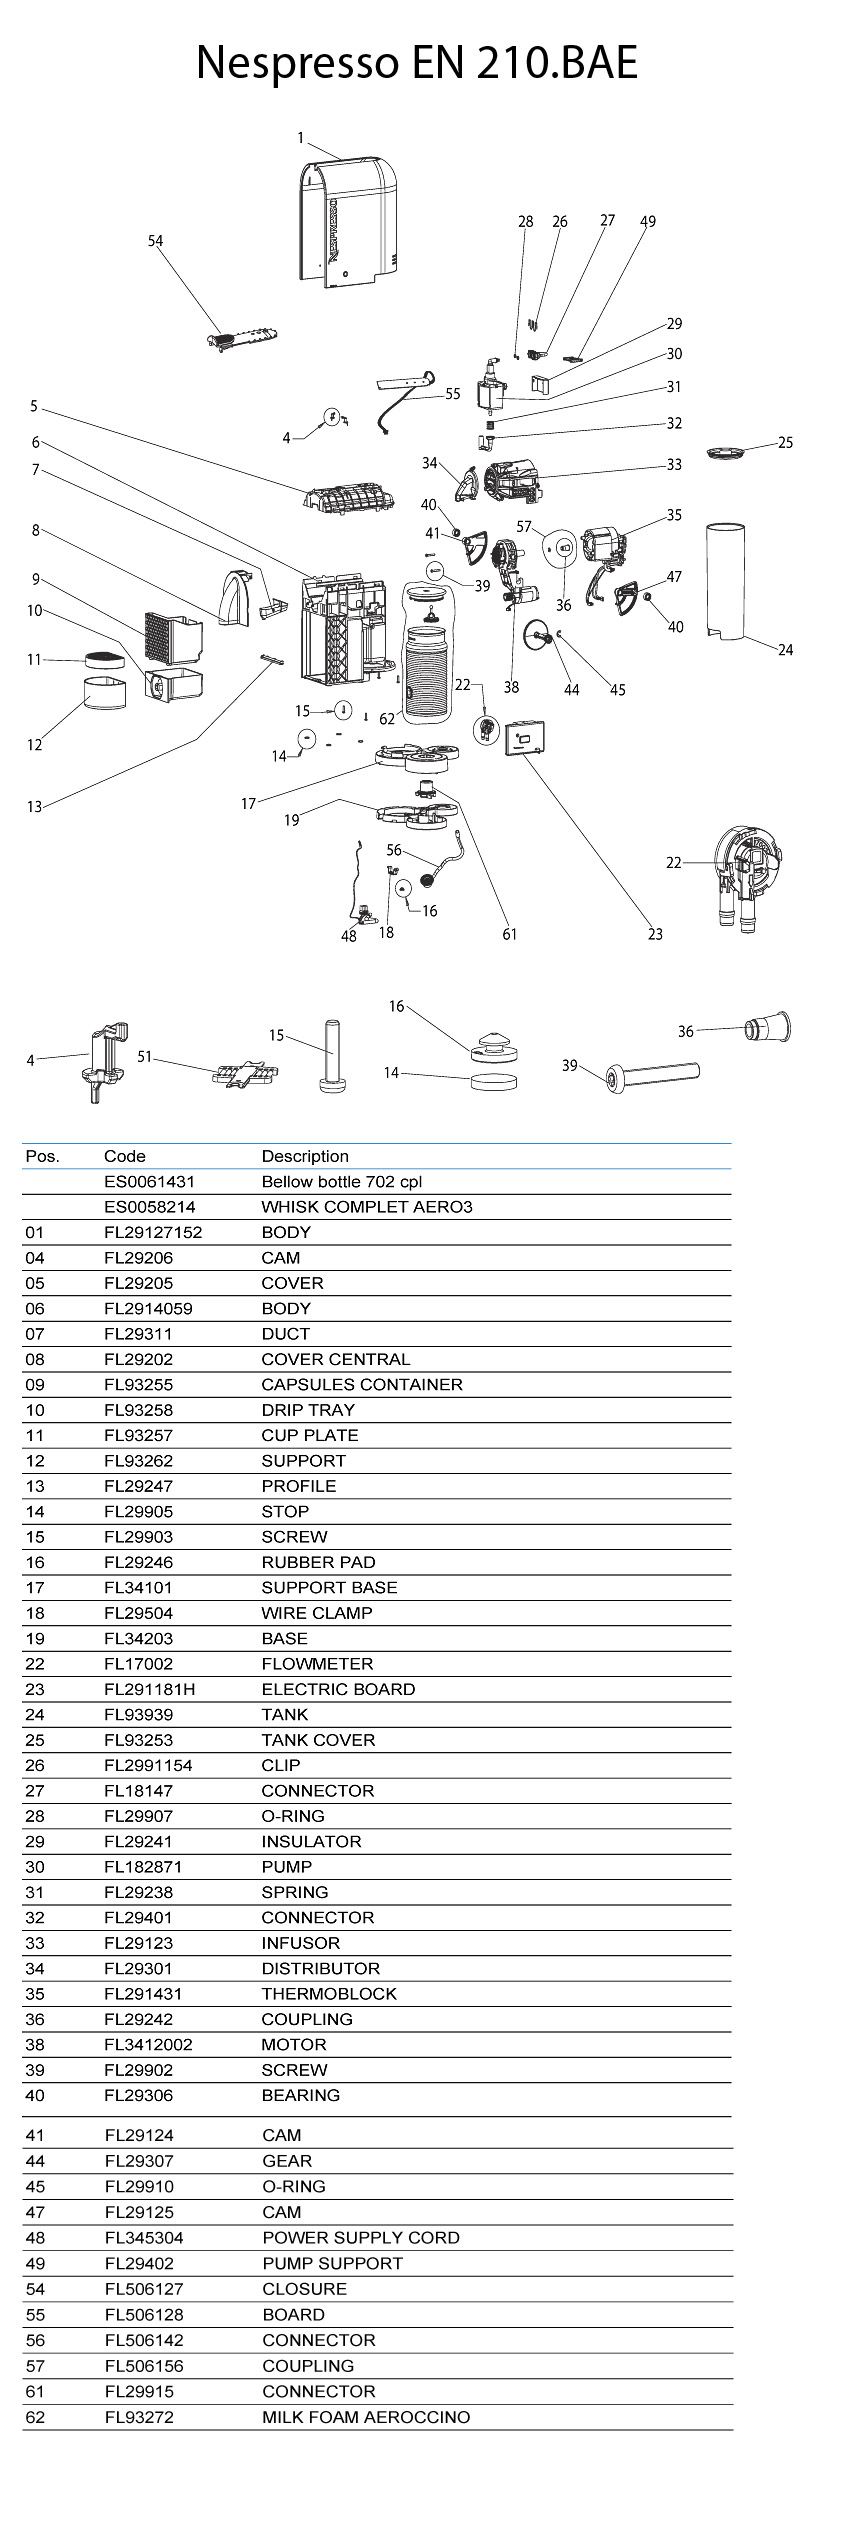
Parts list.
Thank you for this great tutorial! It saved my Nespresso U! You rock Sir!
Thank you for this! So thorough and exactly what I needed. Only 3 days without my nespresso while I waited for the part to come from Amazon. You are awesome!
Great post. Thank you for the info. Had the same issue with a XN2501 🙂
Sorted my machine – brilliant thank you!!!
Thanks. Just the extra info I needed to replace the drip stop that had become dislodged when a pod got mangled!
Thanks so much for this solution! My machine works a treat now and I bought 2 of the distributors, just in case I broke one putting it in so now I have a spare.
Given you were so great to add in some ‘take care’ notes along the way, a quick note that you might like to add near the end of the instructions at step 5…when putting the front cover back on, I snapped the 2 little tabs either side at the top of the outer cover, above and either side of the distributor in the outer cover itself. They are almost impossible to glue back on so now I cannot click the outer cover back in for a snug fit 🙁
Still super happy that my machine now works though! Thanks again 🙂
thank you so much mine is a C55 and it worked perfectly
Thanks so much for this excellent tutorial. It turns out there was nothing broken on mine but after following your instructions and cleaning all the parts the flow was so much better that the root cause (pressure building up and leaking from the rear seal as it had nowhere else to go) was so much better.
Absolutely briliant, many thanks. I found that when fitting the new distributor, trying to fit the bottom clip first (many times) resulted in almost breaking the top tab, so for me, fitting the top tab first followed by the bottom tab was much easier.
I have a Pixie that makes clear hot water at times now after I found a gasket in the pod dump. The gasket looks like it might seal around the back of the pod inside of the infuser part. Would someone please take a small mirror and look into the back of the infuser to see if you see a black gasket around the 4 blades that cut the holes in the back of the coffee pods.
Thank you so much for making this. We managed to fix our machine quite easily after sourcing a new part .
Perfect advice thank you!! I managed to fix with a little super glue.. not as smooth as it should be so I’ve ordered the replacement part. Saved me buying a new machine 🙂
Had the same problem as Kathryn above but still very happy that the machine now works.
A big thank you from me as well!
Brilliant instructions and a massive $ saver! Part cost me around $17 with postage from Ebay – so much better than either taking to repair shop or buying a new one (which is probably the option I would have gone for). Instructions and videos were great and made replacing relatively straightforward. Thanks so much!
Thank you for a great tutorial! Besides saving me money and an otherwise functioning coffee machine, fixing it myself made me feel quite accomplished 😀
Many thanks. Great explanation.
You absolute legend! Your tutorial was just the ticket to get my much-loved Krups “U” model working once again; it just needed a spare distributor part from eBay and a bit of patience, and everything was done and dusted! Perfect!
Thank you so much for a fantastic repair guide. I have previously repaired a friend’s Nespresso that had the same problem, but the instructions I found were very complicated and required quite taking off the cover. Your guide was very easy to use and so much quicker. Thank you!
Thank you so much for this! I was ready to throw my machine away, but this tutorial saved it’s life
Hiya – what is part #51 and where should it go – mine is out? Thanks
Thanks so much for making this tutorial available. It was just what I needed to get my coffee machine working again!
Thanks for taking the time to share this. And to me it is more than just about saving money… it’s about avoiding unnecessary waste and pollution too. Great stuff!
Was very nervous to try to fix this machine myself and didn’t think I was up for the task, but your step by step tutorial was brilliant. Thank you so much and I now have a working machine!
This was amazing. The hardest part was getting the outer cover off. Great explanation, videos helped and done very quickly. I had read through this and figured out this was the issue, bought the part without confirming and you were spot on with diagnosis. Thank you
Thank you! Spot on! You are a lifesaver!
Onde consigo consertar minha nespresso, o motor parece travado, o café ficou preso e ele não movimenta. Tem alguma indicação, estou no Rio de Janeiro
Thanks! This was perfect.
That you! I’m enjoying a coffee right now having just fixed my machine 😀
I am looking for Part #FL 506127. Do i need to order a new cover as well #FL292205.
Hi I am looking for the below part numbers.
FL 29205
FL 506127
FL 29206
FL 50612
So grateful to have found this site.. you should upload to YouTube for it to go viral!
So happy I managed to resolve the problem without having to buy a new machine!
Agree with others you’re a legend!
OMG!!!!! Thank you soo much for this very detailed instruction. I am not a handy person and was about to give up when I saw this. My machine is saved from being thrown away. It’s working perfectly now. Even the customer service at Nespresso was not able to help me and keeps saying 90% positive it is because I did not descale it or the plate is dirty. Thank you so much!!!
Hi sir
I hope you can help-my water tank seems to be leaking BUT only when I put it into the machine-if i leave on the counter it seems to be fine. This happens whether machine is on or off-any idea?? Do i need a new water tank? If i hold up the water tank and stick my finger underneath and push it up a bit it just seems to flow with water-is it supposed to do that-i imagine that is what happens when it is depressed into the machine.I read that it could be the o ring or the water valve??? Hoping you can shed some light and an idea how to repair.Many thanks
Thank you so much! Worked like a charm!
Only. Had to fob the first few steps
Thanks
Great instructions. It was indeed the distributor that was broken and Amazon had the replacement part. Works like a charm again. Thank you so much!!
Well done fixed my machine as its exact same model and same issue.
Without your guide I would’ve never thought that plastic guides even existed.
Got replacement part on ebay 4£ not bad. Also very intrigued by how that guide can break,
I guess heat over a long time + dry plastic not best combination.
Thank you!
Lifesaver! Distributor broke due to capsule being slightly out of alignment. Quick & easy fix thanks to your demo. Thank you.
Thank you SO much!
Your DIY instructions are amazing and continue to save folks like me $$$ vs planned obsolescence—I had the same distributor clip issue and Amazon had the part at the best price. eBay not as cheap anymore after shipping cost.
My Nespresso U is back in action 15 mins after the part was delivered! Thank you thank you thank you!
Found a machine someone was throwing away with this problem. Thanks to your post and a part that only cost a few dollars, I am up and running. It was super easy to fix.
This wasn’t the problem I had, but when I took off the panels to inspect the operation, the real problem was immediately noticeable! The duct (part #7) was clogged, so the coffee wasn’t flowing out of the nozzle (instead it was flowing into the machine and the internal components, making a huge mess).
I took it out (a bit stupidly, I didn’t read far enough to see the part about squeezing it; i’m lucky I didn’t break the tabs, since I pushed those sideways… school was right, read the whole instruction sheet first!) and cleaned it, and tried to clean the rest of the machine as much as possible (including the face panel).
Works like a charm now! Thank you so much. You saved me 300-500 aussie bucks. You’re a hero!
I’d like to add my thanks for these instructions which worked perfectly. I hate waste and being a victim of the manufacturer’s built-in-obsolescence designs!
Thank you so much for the detailed manual. Very helpful – the machine works like a charm. I bought a replacement part from polish shop, it was very cheap – around $2.
https://north.pl/karta/fl29301-dozownik-kawy-do-ekspresu,606-LG-0112.html
Like Kathryn above, I also broke off the cover tabs at the top of the machine while removing the cover using the method described here. After a bit more research it seems that the best way to remove the cover is to undo the two torx screws on the bottom of the unit. Then the cover simply slides upwards and off. It’s also much easier to access the other parts with the cover completely removed. You’ll want to use a T10 torx bit with the hole in the middle (security torx), though you can also use a small flat bladed screwdriver if you’re careful.
Apart from that, all the information here is great. The new distributor part is on order, and I’m looking forward to my machine working again! Thanks!
Really appreciate this! I’m sure if it hadn’t been for this article I would have purchased a new machine.
One thing if it’s not immediately obvious – you can still have your espresso while waiting for the new part to be delivered. After having taken the front cover off, use your finger to tilt the spout down when the distributor moves forward and hold it there while the coffee pours out.